

Passthrough Devices
Certain instrument controllers require direct access to the emulator, which call for additional setup.
If you were sent here, chances are you will need to follow these steps for your instrument to work.
Please note that you will need to repeat this process three times for each mode [D,K,G] on the MIDI PRO Adapter!
After making sure you have the correct dongle or MIDI PRO Adapter, close out RPCS3 and plug in the instrument’s dongle or MIDI PRO Adapter to your computer.
Installing
Section titled “Installing”-
First, [go to Zadig’s website] and download the latest version, then open it up.
-
Click on
OptionsthenList All Devices.
-
You should now see devices listed. Switch it to your Rock Band 3 Pro Instrument.
In this example, we’re using the Mustang Pro Guitar, which shows up asHarmonix RB3 Mustang Guitar for PlayStation® 3.
-
After selecting the right device, you should see the option to replace the driver.
MAKE SURE YOU ARE REPLACING THE DRIVER ONLY FOR THE PRO GUITAR/KEYBOARD/MIDI PRO ADAPTER!!
ClickReplace Driver.
-
A warning will appear.
Again, make sure you have selected your RB3 Pro instrument’s receiver or adapter.
After you have made sure, clickYes.
-
It will then install the driver. As the program says, it may take a few minutes.

-
If everything goes well, you will get this message:

-
Close Zadig.
-
Open up Rock Band 3 in RPCS3 and connect your controller.
You should see it automatically assign a player number.
Likewise, in Rock Band 3, you will see the instrument ready to join.

Uninstalling
Section titled “Uninstalling”Applying a Zadig driver on a device will make it only work on applications with passthrough. This may cause issues with Clone Hero or YARG.
Thankfully, reverting this is very easy!
-
Open the Start menu and search for
Device Manager. Open it.
-
Scroll down until you find the
Universal Serial Bus devicescategory.
Expand it and right click the instrument you applied the Zadig driver on and then selectUninstall device.
In this example, it’s the Pro Guitar (Harmonix RB3 Mustang Guitar for PlayStation® 3).
-
In the next window that pops up, make sure to tick
Attempt to remove the driver for this device.
After that, clickUninstalland that’s it!
When you disconnect then reconnect the device, it will revert back to the original driver.
-
Navigate to
/etc/udev/in your file browser.
Enter therules.dfolder.
If it doesn’t exist, make it.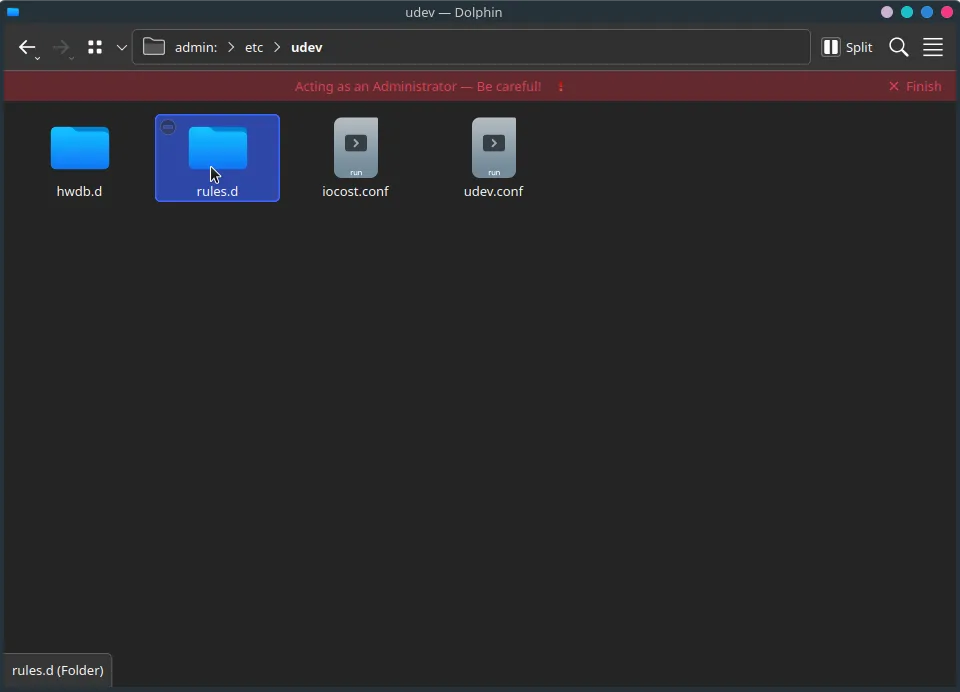
-
Create a new file.
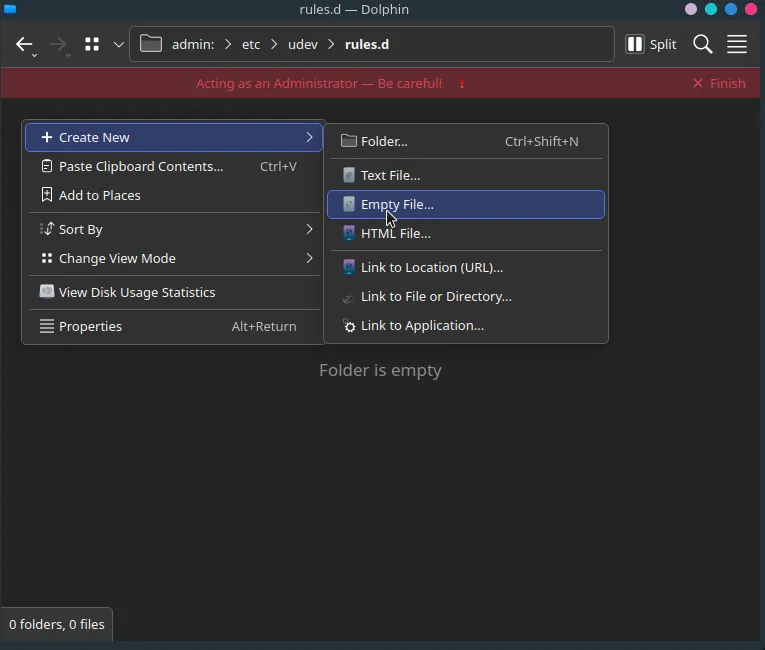
Name it
99-ps3-peripherals.rules.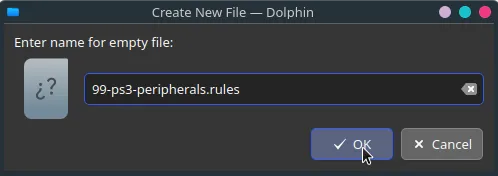
-
Open the file in a text editor.
Add an entry for your controller(s) using this format:SUBSYSTEM=="usb", ATTRS{idVendor}=="ABCD", ATTRS{idProduct}=="1234", MODE="0666"Replace
ABCDwith the vendor ID and1234with the product ID for your controller(s).
Check below for instructions on how to find this information.
In this example, a PS3 Mustang and PS3 Keyboard are being added.
When you’re done, save your edits to the file.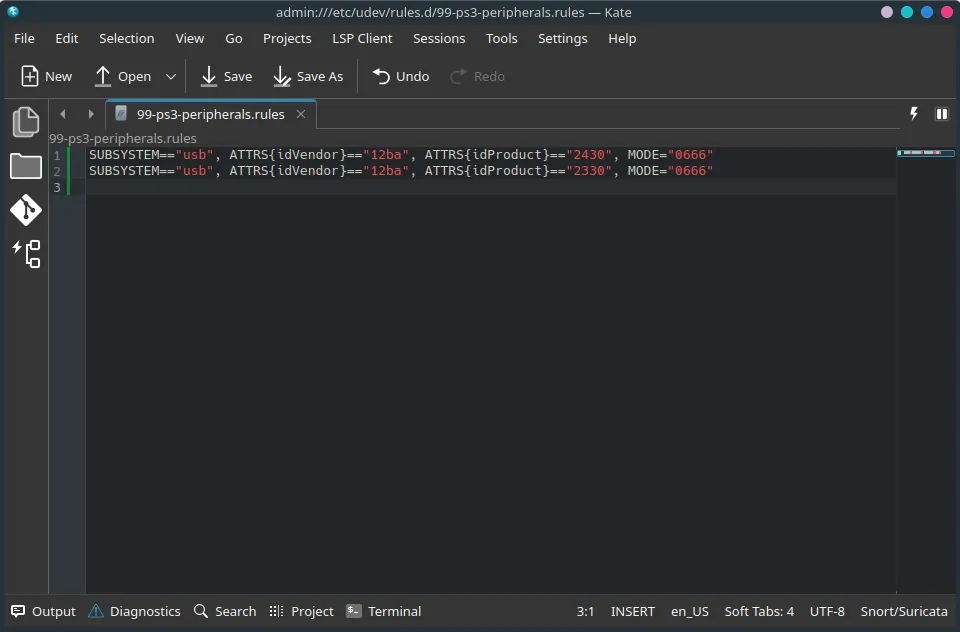
-
Run
sudo udevadm control --reload-rulesin a terminal or reboot your system.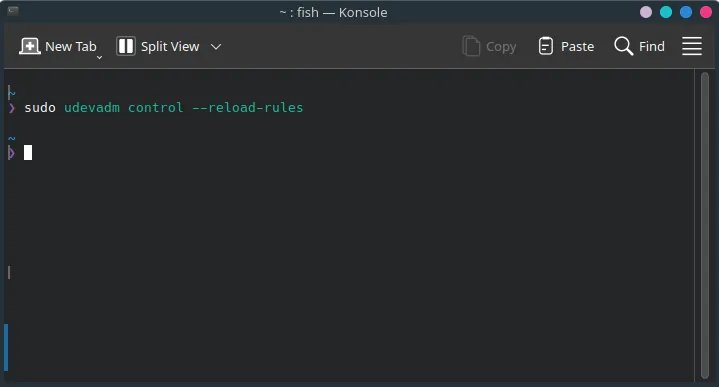
-
Disconnect your controller(s).
-
Open up Rock Band 3 in RPCS3 and connect your controller(s).
You should see it automatically assign a player number.
Likewise, in Rock Band 3, you will see your instrument(s) ready to join.
Finding your instrument’s PID and VID
Section titled “Finding your instrument’s PID and VID”To find your controller’s information, you can either find it yourself or use the list below.
Using lsusb
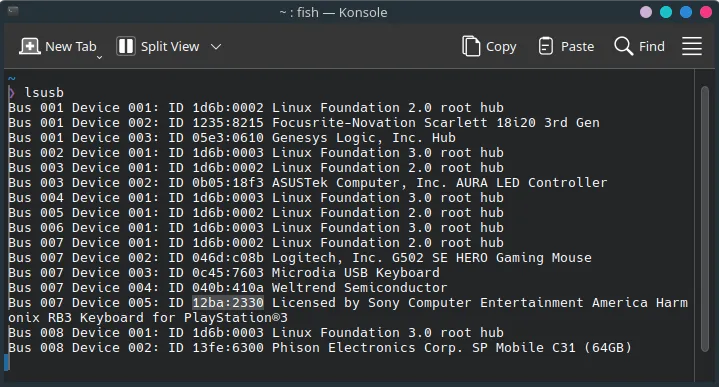
Section titled “Using lsusb”To find it yourself, type lsusb into a terminal.
You should see the vendor ID and product ID for your controller(s) in the list.
List of controllers
Section titled “List of controllers”- Santroller (Mode switch signal)
Use this in combination with the instrument it’s emulating.SUBSYSTEM=="usb", ATTRS{idVendor}=="1209", ATTRS{idProduct}=="2882", MODE="0666"
- RB1/2 Guitar
SUBSYSTEM=="usb", ATTRS{idVendor}=="12ba", ATTRS{idProduct}=="0200", MODE="0666"
- RB1/2 Drums
SUBSYSTEM=="usb", ATTRS{idVendor}=="12ba", ATTRS{idProduct}=="0210", MODE="0666"
- RB3 Keyboard
SUBSYSTEM=="usb", ATTRS{idVendor}=="12ba", ATTRS{idProduct}=="2330", MODE="0666"
- RB3 MIDI Pro Adapter [D]
SUBSYSTEM=="usb", ATTRS{idVendor}=="12ba", ATTRS{idProduct}=="0218", MODE="0666"
- RB3 MIDI Pro Adapter [K]
SUBSYSTEM=="usb", ATTRS{idVendor}=="12ba", ATTRS{idProduct}=="2338", MODE="0666"
- RB3 Mustang Guitar
SUBSYSTEM=="usb", ATTRS{idVendor}=="12ba", ATTRS{idProduct}=="2430", MODE="0666"
- RB3 MIDI Pro Adapter [G] (Mustang)
SUBSYSTEM=="usb", ATTRS{idVendor}=="12ba", ATTRS{idProduct}=="2438", MODE="0666"
- RB3 MIDI Pro Adapter [G] (Squier)
SUBSYSTEM=="usb", ATTRS{idVendor}=="12ba", ATTRS{idProduct}=="2538", MODE="0666"
- RB1 Guitar
SUBSYSTEM=="usb", ATTRS{idVendor}=="1bad", ATTRS{idProduct}=="0004", MODE="0666"
- RB2 Guitar
SUBSYSTEM=="usb", ATTRS{idVendor}=="1bad", ATTRS{idProduct}=="3010", MODE="0666"
- RB1 Drums
SUBSYSTEM=="usb", ATTRS{idVendor}=="1bad", ATTRS{idProduct}=="3138", MODE="0666"
- RB2 Drums
SUBSYSTEM=="usb", ATTRS{idVendor}=="1bad", ATTRS{idProduct}=="3110", MODE="0666"
- RB3 Keyboard
SUBSYSTEM=="usb", ATTRS{idVendor}=="1bad", ATTRS{idProduct}=="3330", MODE="0666"
- RB3 Mustang Guitar
SUBSYSTEM=="usb", ATTRS{idVendor}=="1bad", ATTRS{idProduct}=="3430", MODE="0666"
- RB3 MIDI Pro Adapter [D]
SUBSYSTEM=="usb", ATTRS{idVendor}=="1bad", ATTRS{idProduct}=="3430", MODE="0666"
- RB3 MIDI Pro Adapter [K]
SUBSYSTEM=="usb", ATTRS{idVendor}=="1bad", ATTRS{idProduct}=="3338", MODE="0666"
- RB3 MIDI Pro Adapter [G] (Mustang)
SUBSYSTEM=="usb", ATTRS{idVendor}=="1bad", ATTRS{idProduct}=="3438", MODE="0666"
- RB3 MIDI Pro Adapter [G] (Squier)
SUBSYSTEM=="usb", ATTRS{idVendor}=="1bad", ATTRS{idProduct}=="3538", MODE="0666"
By default, macOS will attempt to load its own drivers when trying to use passthrough instruments on RPCS3.
Luckily, this is easy to fix!
-
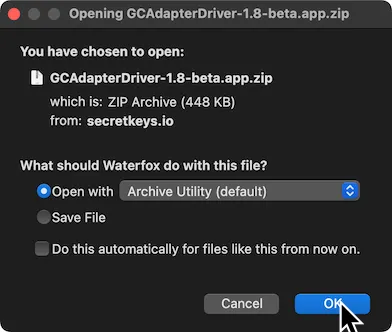
First, [click here download the GCAdapterDriver 1.8 beta]
-
Drag the extracted
GCAdapterDriver-1.8-betaapplication to theApplicationsfolder.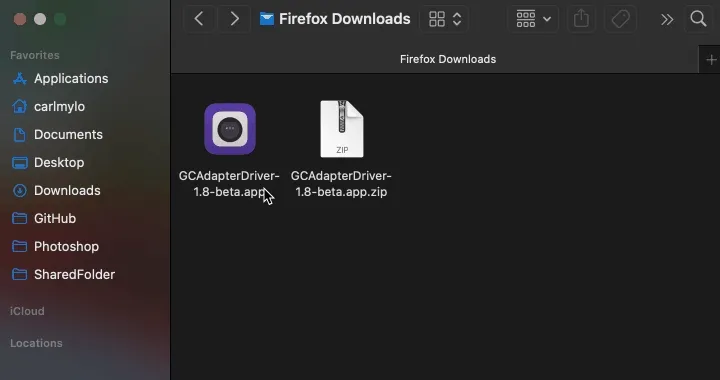
-
In the menu bar, click on the new GCAdapterDriver icon.
Click on the slider to try to activate it.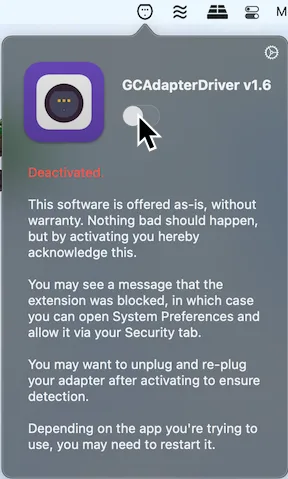
-
It will initially block the system extension.
Click onOpen Security Preferences.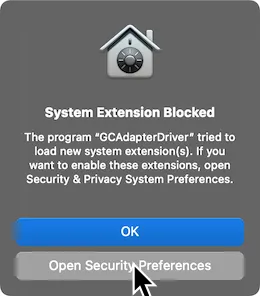
-
Unlock the page by click on the lock icon on the bottom left.
Click onAllowafter this.
Don’t forget to lock the page again when you’re done.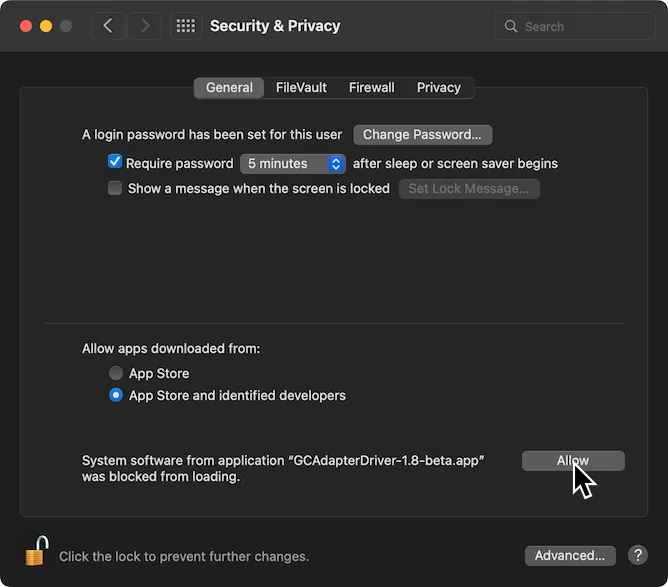
-
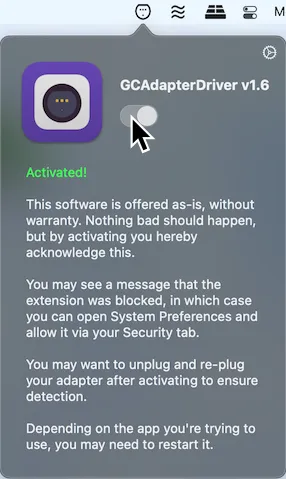
Now, activate GCAdapterDriver’s slider in the menu bar now.
Open up Rock Band 3 in RPCS3 and connect your controller.
You should see it automatically assign a player number.
Likewise, in Rock Band 3, you will see the instrument ready to join.