

Custom Configuration: Audio
-
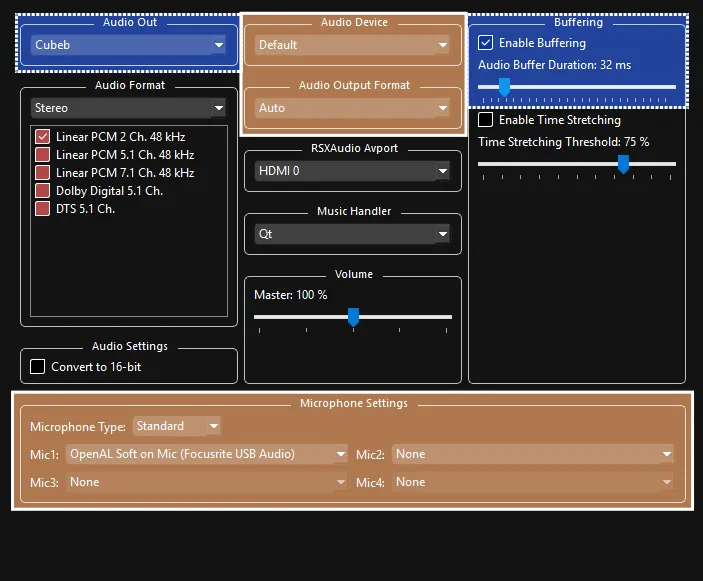
 Tweak depending on computer:
- Leave
Enable Bufferingon if you prefer stable audio at the cost of latency.
Disable it if you want less latency at the cost of potential audio errors. - Adjust
Audio Buffer Durationdepending on system. This only works ifEnable Bufferingis on!- Set this as low as you can before you hear crackling.
32 msis a decent starting point on most systems.- Lower values = less audio latency but more CPU impact.
- Higher values = more audio latency but use less CPU impact.
- Vocalists are affected the most by this, as a higher latency creates a distracting echo. Instrument players can use calibration to compensate regardless of audio buffer setting.
- You can change this while the game is running!
- Changing this require re-calibrating in Rock Band 3’s system settings.
- Set this as low as you can before you hear crackling.
- Change
Audio OuttoXAudio2- While most users should stay onCubeb, a few people have experienced better performance with XAudio2. Your milage may vary.
- Leave
-
 Change depending on audio setup:
- For vocalists:
- Set
Microphone TypetoStandard. - Select an input device in
Mic1,Mic2, andMic3for vocals.
If not playing vocals,Mic1will be used for voice chat.
- Set
- Change
Audio Deviceif you want audio to come out of another device that isn’t the default one. - Change
Audio Output Formatif you’re using a surround sound setup.
Rock Band 3 supports LPCM 2.0, LPCM 5.1, and Dolby Digital 5.1 (NOT RECOMMENDED!).
- For vocalists: