
Converting Xbox 360 CONs to PS3/RPCS3 Format
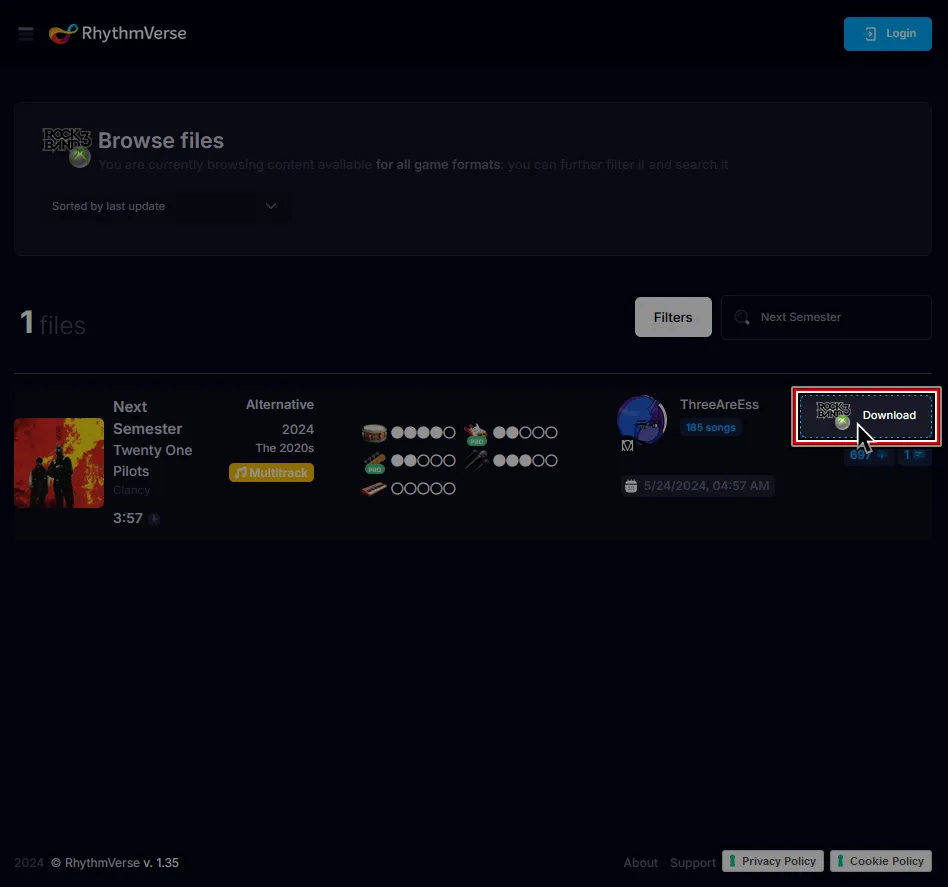
[Download the songs of your choice from RhythmVerse].
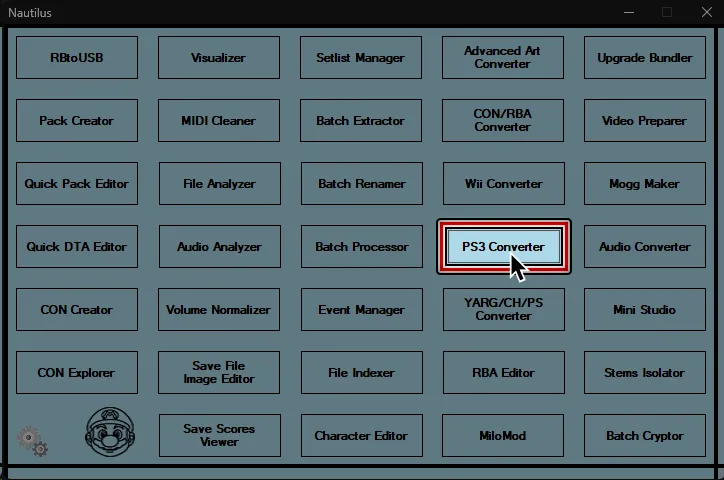
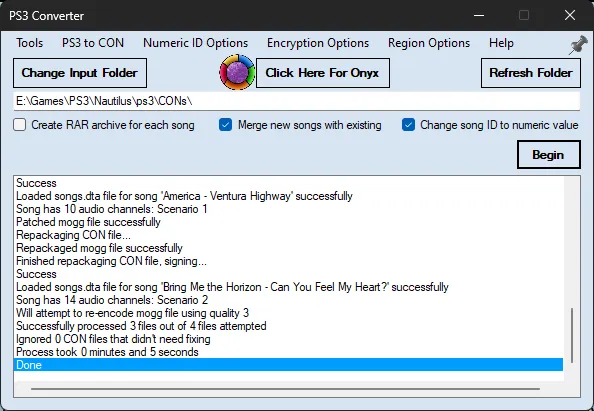
Open Nautilus and select PS3 Converter.
From the Tools menu select One-Click Batch PS3 Fixer.
Click OK on the message box that appears.

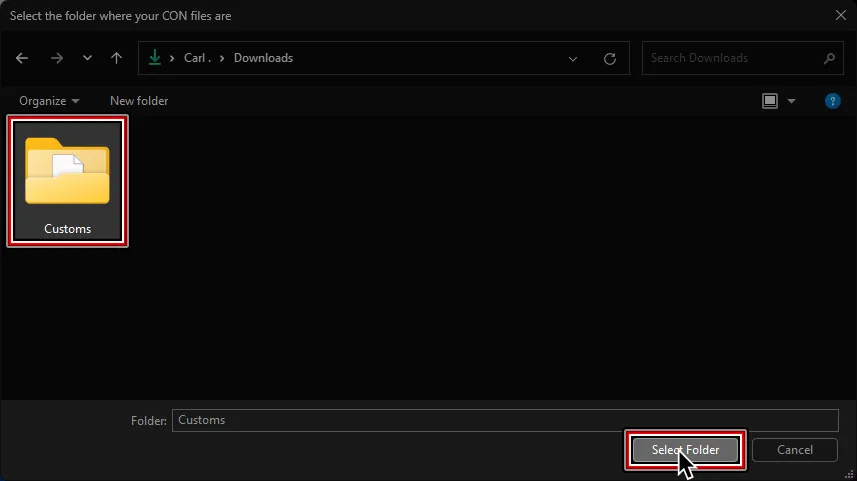
Select the folder where you stored your customs.
Any files that have issues, such as encryption, bad song IDs, or too many audio channels, will be processed.
When it’s done, you can close Nautilus.
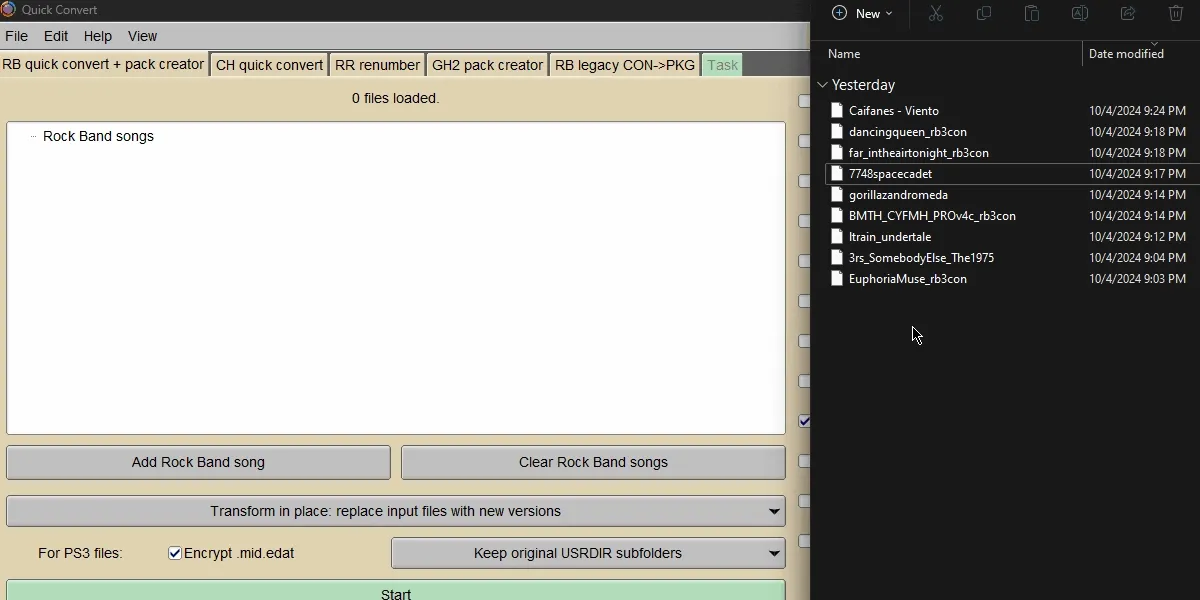
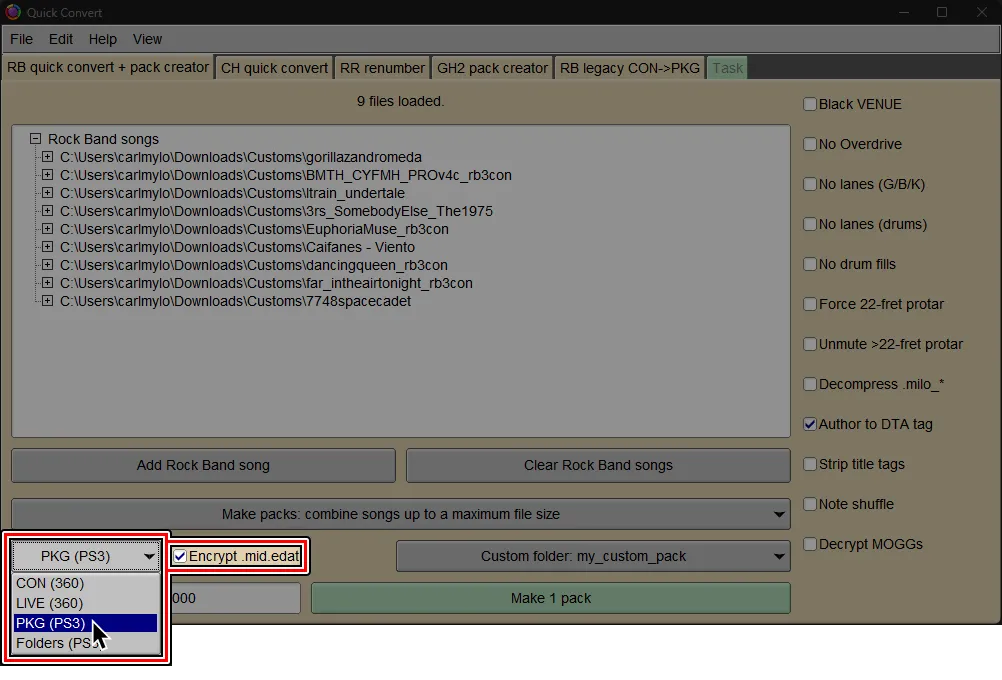
Open Onyx Music Game Toolkit and click Quick convert/pack.

Stay on the RB quick convert + pack creator tab.
You can either drag and drop the files you modified or click on Add Rock Band Song to select them.
It is also recommended to enable
Author to DTA tagat the bottom right.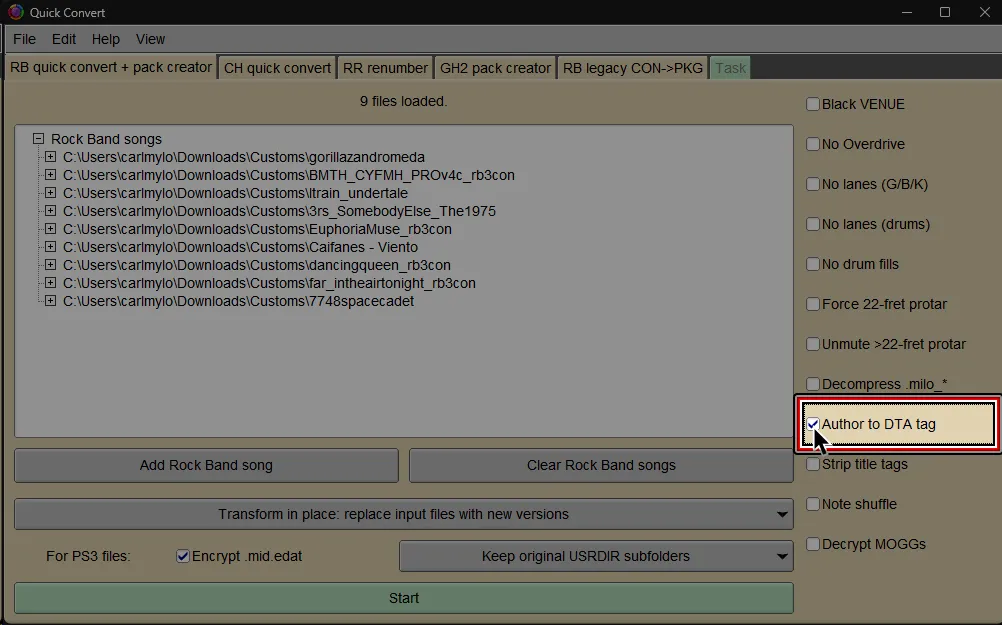
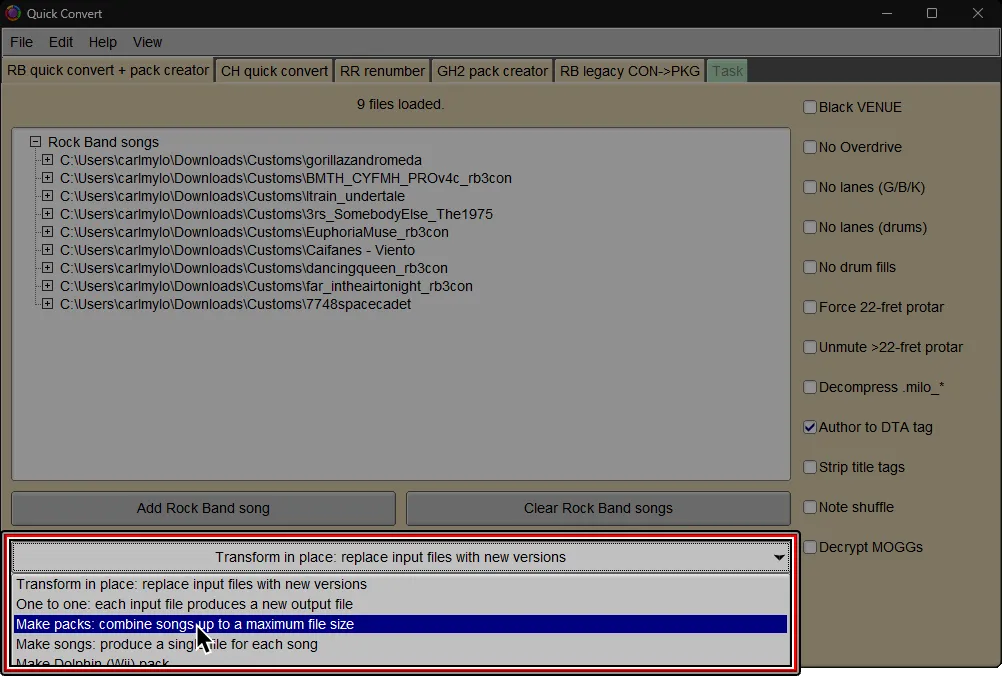
Below the first row of gray buttons, click the first menu and select Make Packs or Make Songs depending on how you want to combine your songs.
Packs are recommended.
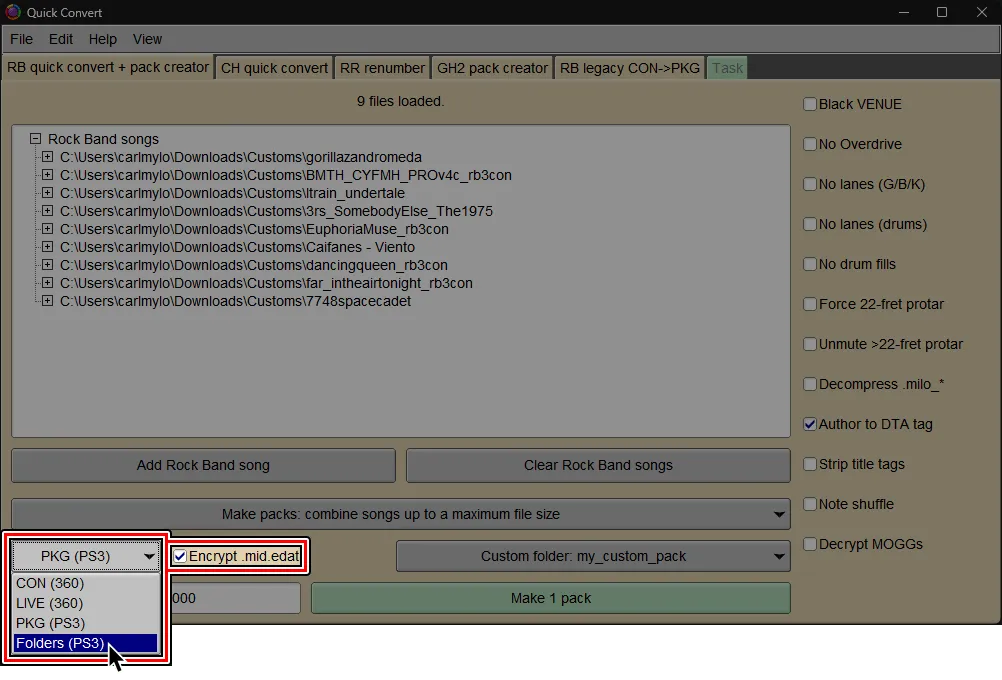
At the bottom left, pick between either PKG (PS3) or Folders (PS3).
Folders (PS3)is recommended for RPCS3 users and PS3 users who know how to use FTP.
It is much faster than PKG creation and can create packs larger than 4GB (4000 MiB).PKG (PS3)is only recommended for PS3 users who can only use USB flash drives to add more songs or if you want to share packs.
(Optional but highly recommended)
By default, Onyx will generate a folder with a name based on the first (or only) song in the pack, like OxxxxxSongName.
It’s suggested to enter a custom name. Simply change Combine into one new USRDIR subfolder per pack to Custom USRDIR subfolder.
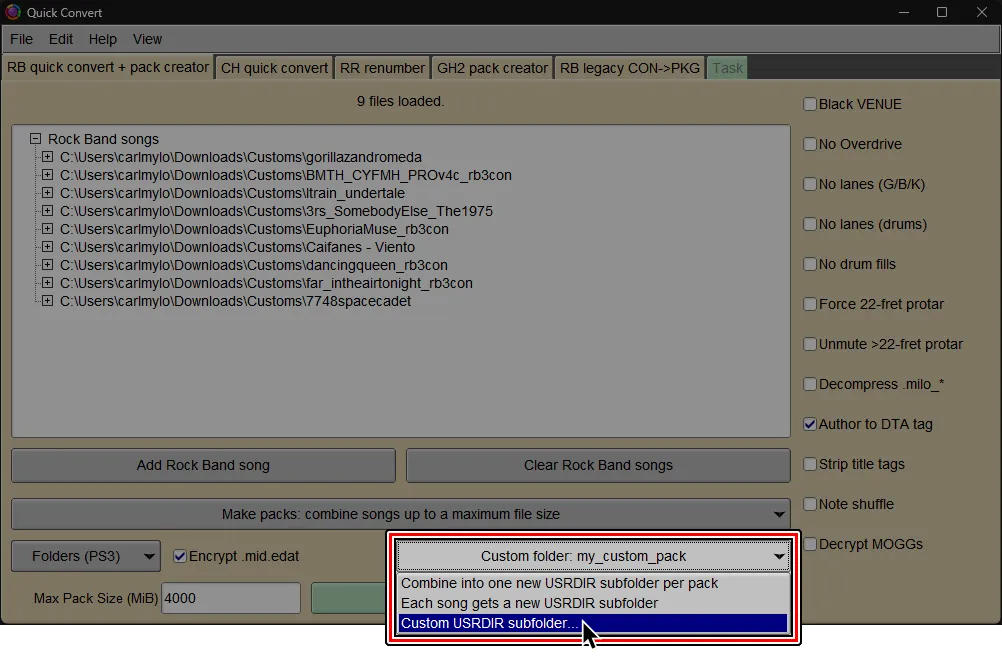
It’s suggested for single songs too, as it’s easier to locate a song you already installed within the game files.

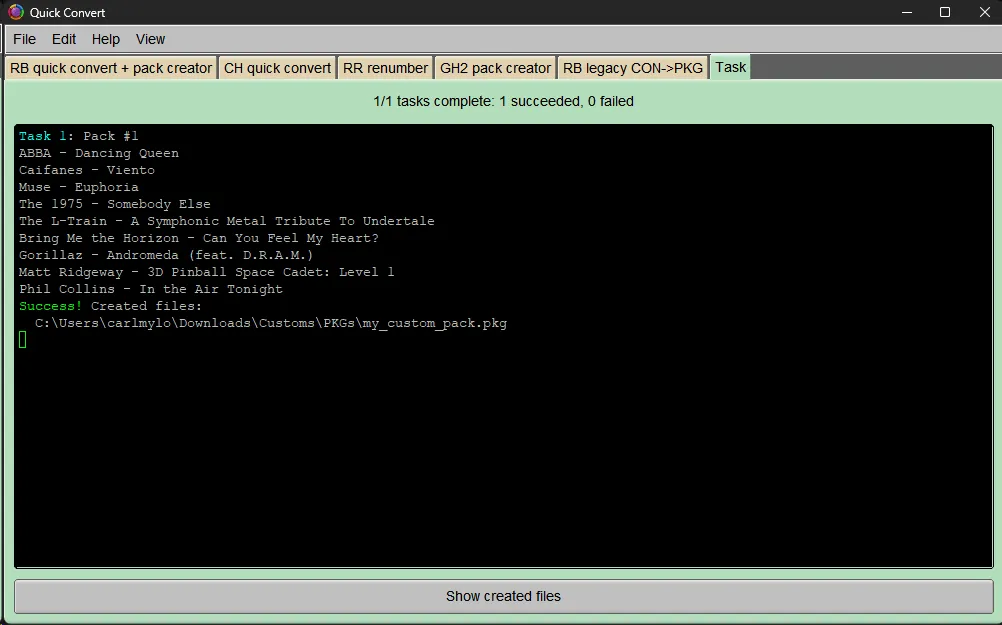
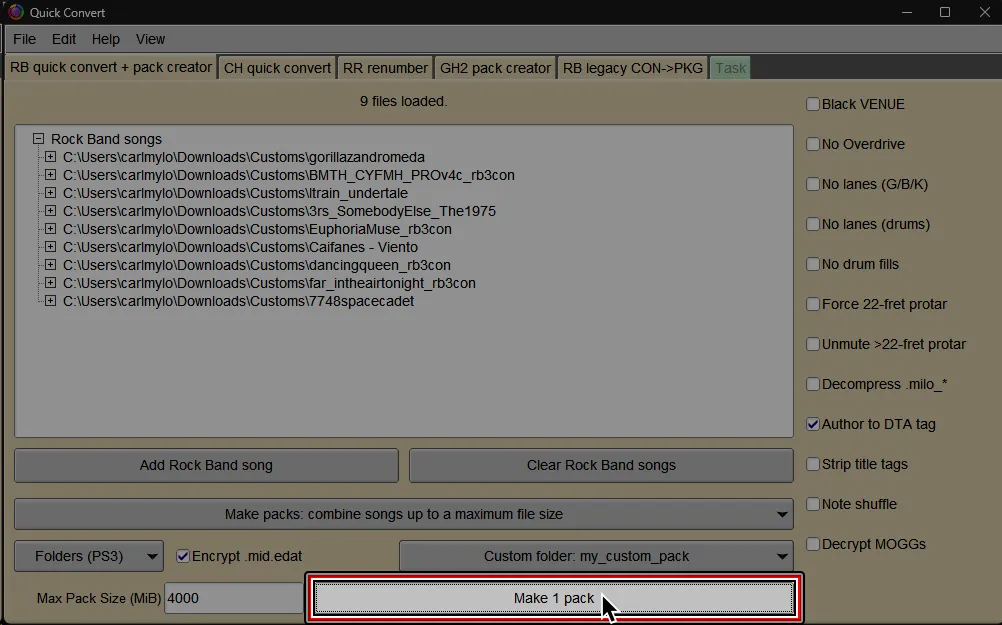
At the bottom, select the big button labeled Make pack (or Start if you used the Make Songs option.)
If you’re on RPCS3, find and select the dev_hdd0 folder. This is usually in the folder where RPCS3 is installed to.
If you’re on PS3, pick whichever folder is the most convenient.

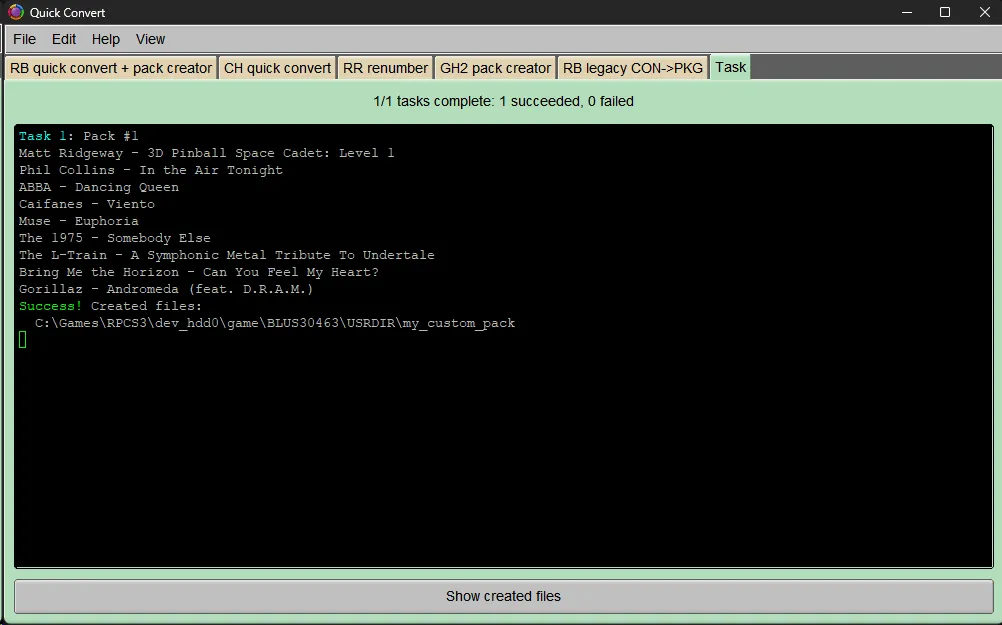
If you’re on RPCS3, it will auto-install into your RPCS3 directory, ready to play.
If you’re on PS3, you’ll have a pack folder ready to transfer to dev_hdd0/game/BLUS30463/USRDIR via FTP.
(Optional but highly recommended)
By default, Onyx will generate a PKG that outputs a folder with a name based on the first (or only) song in the pack, like OxxxxxSongName.
It’s suggested to enter a custom name. Simply change Combine into one new USRDIR subfolder per pack to Custom USRDIR subfolder.

It’s suggested for single songs too, as it’s easier to locate a song you already installed within the game files.
At the bottom, select the big button labeled Make pack or (Start if you used the Make Songs option.)

Select where you would like to save the PKG file and give it a name.

It should successfully convert and a PKG file will be created, ready to install.
Simply install it like any other PKG.